There were several changes to the way classic SOAP web services work in X3 Update 9. One change is the elimination of the web service tester from the browser. Details on this are in my blog post on Testing X3 SOAP Web Services in Update 9.
Another change is how classic SOAP web services are consumed with .net. This blog summarizes some of the bumps I encountered while trying to prepare .net applications to consume X3 web services in Update 9.
WSDL
The first change is the wsdl file that is referenced in the .net project. In previous versions of X3, the wsdl was added to the project as a Web Reference, using a format similar to below:
http://[x3server]:[port]/adxwsvc/services/CAdxWebServiceXmlCC?wsdl
The new wsdl url is now in the following format:
http://[x3server]:[port]/soap-wsdl/syracuse/collaboration/syracuse/CAdxWebServiceXmlCC?wsdl
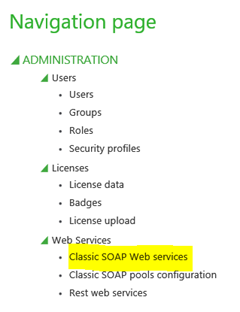
This can also be found by going to the SOAP Generic Web Services option under Administration / Web Services.
The Url is displayed below the description. To get the full url, just add the prefix http://[x3server]:[port]/ in front of the url.
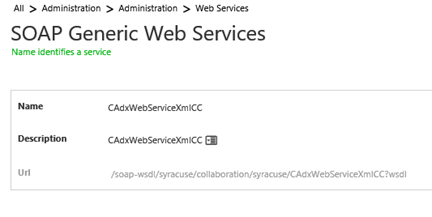
One thing that originally stumped me was that the first wsdl was still valid when attempting to add it as a web reference for Update 9, so everything appeared to be okay, but the .net program call to the X3 web service wouldn't work.
Authentication
The second change is the authentication method. In prior versions, the X3 authentication information (user name and password) was included in the context. In Update 9, the user name and password are no longer included in the context, but they can be passed using basic authentication.
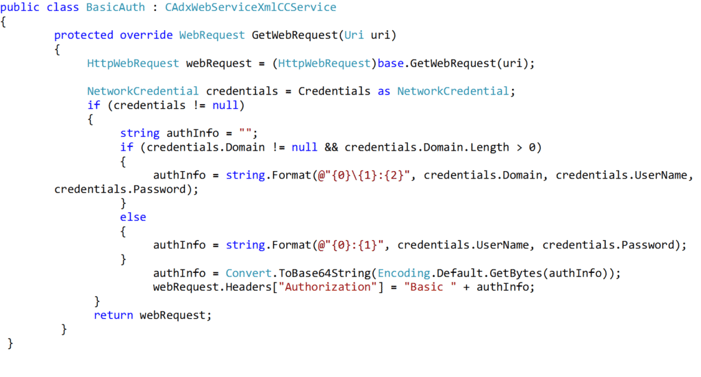
Below is an example of adding basic authentication to the web service call.
- Create a class called BasicAuth which inherits the CAdxWebServiceXmlCCService class from the wsdl. Method GetWebRequets in this class adds the basic authentication information to the web request header.
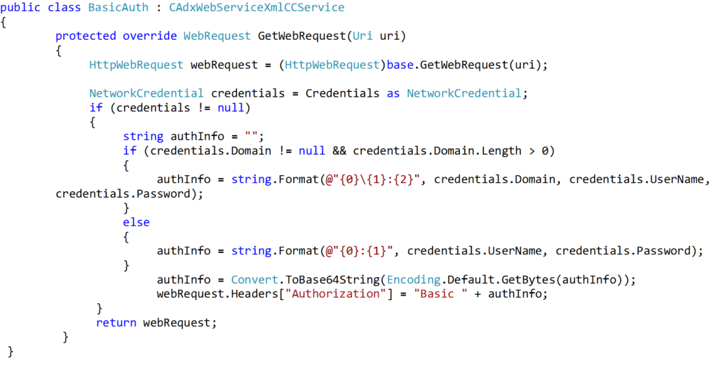
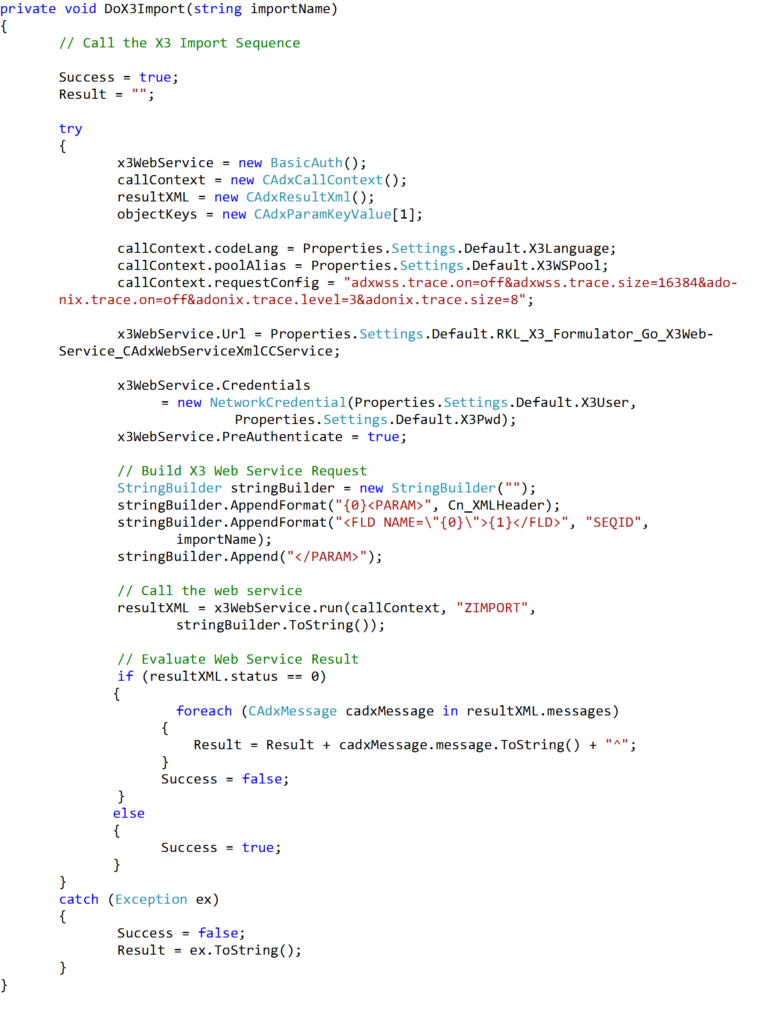
- The Web Service call is instantiated as a BasicAuth type, which is the class created above.

- The credentials are added to the Web Service.

- The web service is called in the same way it was called in previous versions of X3.
Overview of Steps
Below is a summary of the steps required to call a classic SOAP Web Service from Update 9 from a .Net program.
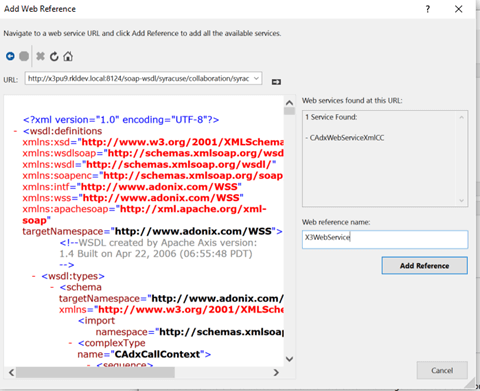
- Add the X3 wsdl to the .net project as a Web Reference. (Add Service Reference – Advanced – Add Web Reference.)
- Create a class to add the Basic Authorization to the header of the SOAP request.
Call the web service. Below is an example. The parameters will vary based on the type of web service being called (object vs. subprogram) and the operation being called. The example below is an X3 subprogram published as a web service.
Summary
Although the basic methodology for calling Classic X3 Soap Web Services in Update 9 is the same, there are a few areas that must be changed to successfully integration web services calls from .Net. This post outlines the basic changes, including some examples. Hopefully this will help you avoid the stumbling points that I encountered when integrating our classic SOAP Web Services in X3 Update 9.
For additional resources on web services in Sage X3, refer to my 5 Days of Sage ERP X3 Web Services series.


