Are you tired of the constant hassle of having to change the default value in a drop down menu every time you input data into Sage 100?

Do you find yourself wasting precious time on this mundane task? Well, fret no more because there is a solution! By utilizing Custom Office, you can easily set default values for specific fields, Custom Office not only saves you time, but it also allows you to make advanced customizations to your Sage 100 experience, such as changing tab stop sequences, disabling or hiding fields, adding new fields or tables, and even advanced scripting.
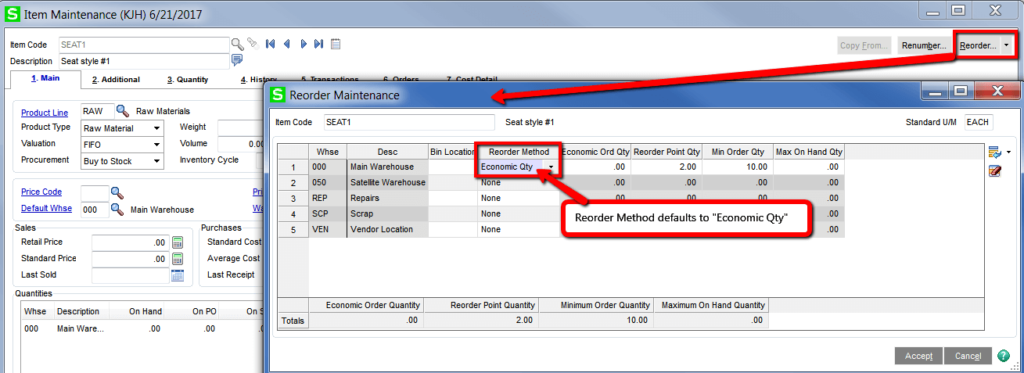
For example, in Sage 100, the Inventory Reorder method defaults to "Economic Qty". This means that the system will suggest the quantity to reorder based on the most economical option. However, if you prefer a different method, such as "Reorder Qty", Custom Office allows you to easily change the default value. This can save you a lot of time and effort in the long run, especially if you frequently input data into Sage 100.

Steps:
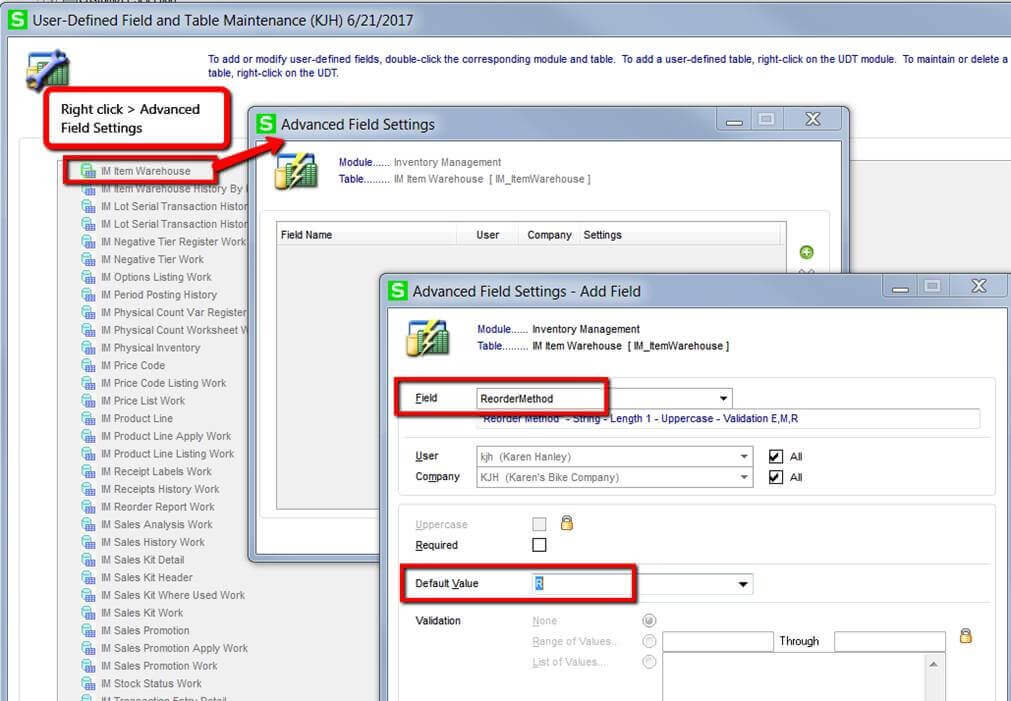
- Go to Custom office module > Main menu > User-Defined field and table Maintenance
- Open Inventory Module
- Find "IM Item Warehouse"
- Right click on "IM Item Warehouse" & select Advanced Field Settings
- Select field: ReorderMethod
- Change default from E to R (E=Economic, R=Reorder, M=Maximum)

Setting a default value is just one of the many useful ways of using Custom Office. Custom office can be used to change tab stop sequences, disable or hide fields, change labels, add new fields, add new tables or do advanced scripting. Please contact RKL if you need assistance in any of these areas.